
Hallo zusammen! In the last few years, my life has gone through dramatic changes, including but not limited to dipping my toes into the utterly complex yet intriguing world of high school, speedrunning learning German, and joining my school’s rocketry club.
The latter was, in my honest opinion, one of the best coding opportunities I have ever come across.
For those who don’t know, the Turkish government actively encourages schools to get students involved in project-based learning to solve real-world problems. The biggest, most prestigious government-backed platform for this is TEKNOFEST. Founded by the T3 Foundation (the same organization behind the Deneyap Technology Workshops, from which I graduated with an award), TEKNOFEST is less of a rigid science fair and more of a massive technology festival. It hosts high-stakes competitions across a variety of cutting-edge fields, including AI, UAVs, agricultural tech, and, most notably, rocketry.
So, how did I start coding rockets? Well, I am still in awe of the whole experience, so I might be exaggerating a tad. Nevertheless, here is how it began.
Meeting “Mr. Hypermach”
Around February of 2026, I had the chance to step into my school’s TBA, which roughly translates to a makerspace. Select schools, like the one I attend, have a room dedicated to all things maker, ranging from 3D printers and laser engravers to professional-grade music recording equipment. In this makerspace, I happened to meet the president of Hypermach, the school’s rocketry team.
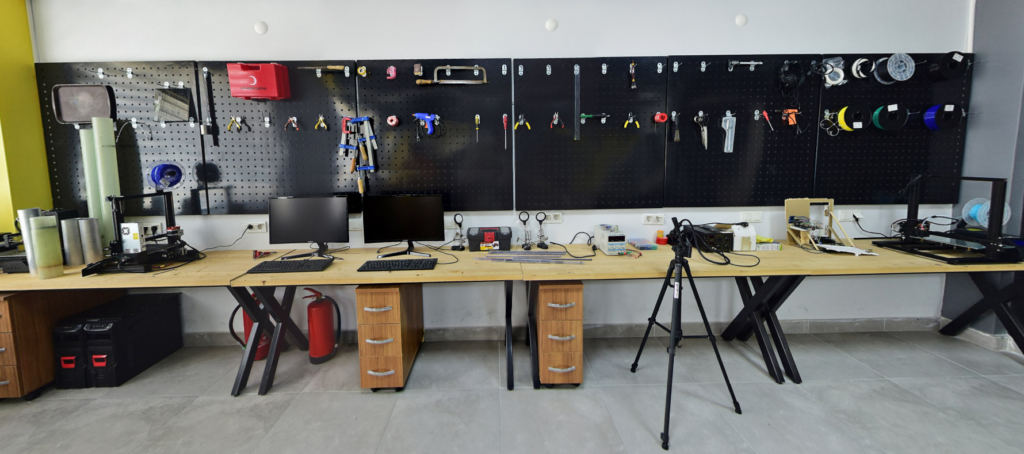
At the time, I knew the school had a rocketry team, that they had won an award somewhere, and that they had a lengthy admission process for newcomers consisting of a giant education playlist followed by multiple interviews and presentations. Although I am well aware that a Google search or two would reveal who he is, I’ll call him Mr. Hypermach for the entirety of this blog post.
Mr. Hypermach and I were having a chat about additive manufacturing and how Hypermach used different types of filament around the rocket to cut down on weight and improve structural integrity. All of a sudden—I’m still not sure how it came to this—he offered me a spot on the team as an Avionics Technician, essentially coding the rocket.
At first, I was a bit bamboozled. It caught me absolutely off-guard. Me, a coding beginner whose portfolio consisted of nothing more than a simple calculator made in 2020 as a first Lua project and a modular smartwatch using a Deneyap Kart, was being offered the chance to code the avionics system for a rocket.
I hesitated initially. Usually, whenever I get involved in projects like this, I end up having to undertake the entire workload because others simply stop caring. But as he showed me photos of previous rockets and the launch site, I developed a sense of trust in the team. They had done this multiple times before, there was an existing avionics team, I could get all the help I needed, and I got to bypass the lengthy admission process. So, after blankly staring into Mr. Hypermach’s eyes for about five seconds, I calmly said, “Sure!”
Thus marked the beginning of my Hypermach journey.
Trial by Fire: The Arduino Mega and TEKNOFEST Protocols
Combined with my excitement and utter surprise, the following hour resulted in one of the funniest situations I’ve ever found myself in.
After I agreed to join, Mr. Hypermach literally pushed me toward the preexisting avionics team. They sat me down on one of their many stools in front of a laptop. Connected to that laptop was an Arduino Mega. That was our custom flight controller.
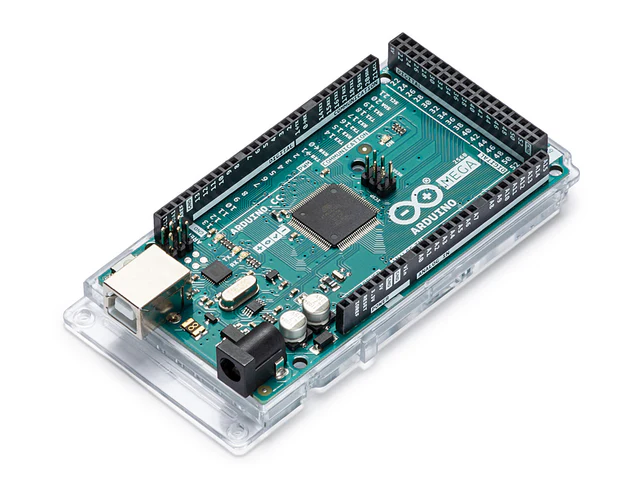
Yes, you heard me right: a custom flight controller.
You might be thinking, Well, what’s the big deal about a few sensors hooked up to a microcontroller? You’re just supposed to make it read and send data.
WRONG.
TEKNOFEST operates on a bit of a different level. To pass their rigorous requirements, you must master, and I don’t use the term “master” lightly, two critical parts of their testing protocol: the Sensor Monitoring Test (SMT) and the Synthetic Flight Test (SFT). These are not mere suggestions or nice-to-haves; they are the literal gatekeepers that determine whether your flight computer is cleared for flight or eliminated from the competition.
1. Sensor Monitoring Test (SMT)
The SMT is essentially a “sanity check” for your data acquisition pipeline. Once the ROKETSAN test software triggers this mode, your flight controller must ignore normal idle processes and focus entirely on streaming live sensor data back to the test bench at a stable 10 Hz. This test is designed to expose noise, filtering issues, or improper calibration in your hardware. You are validating that your raw inputs, altitude, acceleration, and orientation, are being correctly processed and that your communication link is rock-solid. If there is jitter or data dropout here, your team won’t be cleared for launch.
2. Synthetic Flight Test (SFT)
While the SMT checks if your sensors work, the SFT is a trial by fire for your flight algorithm. In this scenario, the ROKETSAN test software stops listening to your physical sensors. Instead, it injects “synthetic” data directly into your flight controller via the RS232 port. Your flight computer is expected to ignore its own physical sensors and treat this artificial, high-pressure data as if it were a real, unfolding launch.
The ROKETSAN software simulates both normal flight profiles and abnormal scenarios, such as sudden, erratic spikes in acceleration or impossible pressure drops, to see how your flight computer handles chaos. During this test, you are required to send back status information packets at 10 Hz, updating the committee on which stage of the flight algorithm has been triggered (e.g., engine burnout, apogee detection, or parachute deployment). If your algorithm cannot maintain stability or fails to trigger the recovery system under these synthetic constraints, your mission ends right there on the testing bench.
Reverse Engineering the Misinformation
These are fair requirements, and I have to give the committee credit: they are thoroughly explained throughout the specsheet, complete with implementation examples. The problem? The documentation was riddled with errors.
If you look at pages 7 or 9 of their official specsheet, specifically bytes 32 and 33, you will notice duplicate byte assignments. Furthermore, the code snippets tell you to use Little Endian when the system actually requires Big Endian (or vice versa).
This misinformation problem forced me to write copious amounts of debug scripts and COM port sniffers just to reverse engineer how the ROKETSAN test software actually reads and sends data. I’m not complaining, though! It forced me to learn how COM ports and serial connections work, and how to sniff them behind Windows’ back.
Ultimately, I wrote the necessary code to run on an Arduino Mega. Despite the hurdle of navigating misleading documentation and encrypted SFT data files, making this part work was incredibly rewarding. I probably wouldn’t have learned any of this from a standard coding course or a YouTube video.
Upgrading to the Raspberry Pi Pico 2
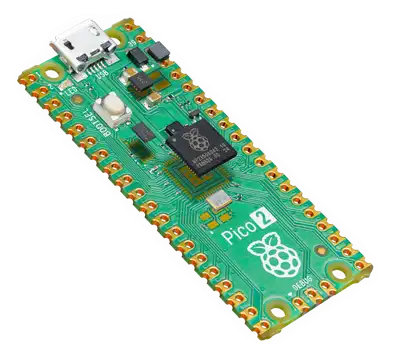
After I completed the SMT-SFT phase, the head of avionics, let’s call him Mr. Avionics, asked me if it was feasible for the team to move from the Arduino Mega to the Raspberry Pi Pico 2, as it is smaller, more efficient, and significantly faster. After a lot of research and a few fairly sleepless nights, I put together a comprehensive document detailing how the transition would affect the team, alongside a successful port of the SMT-SFT code for the Pico 2.
After a bit of back-and-forth, we officially decided to make the switch. Following this endeavor, the team decided it would be best if I also took over the development of the entire communication software.
Diving into Long-Range Comms (LoRa)
Before I tell you about the comms system, it helps to understand how it works. LoRa (short for Long Range) is a low-power, wireless communication technology designed for remote telemetry tracking. Instead of relying on cellular networks, Wi-Fi, or Bluetooth, LoRa operates on unlicensed radio frequency bands (ISM bands, like 868 MHz in Europe) to transmit small packets of data over massive distances.
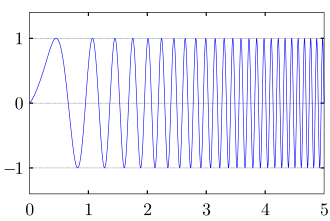
The secret behind LoRa’s impressive range and noise immunity is its underlying modulation technique: Chirp Spread Spectrum (CSS). Traditional wireless communications transmit data on a fixed, narrow frequency, making them highly susceptible to interference. LoRa, however, encodes data using “chirps”, radio signals whose frequency increases or decreases over time, spreading the signal across a wider bandwidth. Because the receiver knows the exact characteristics of these sweeping chirps, it can decode signals that are incredibly weak, even when they drop well below the ambient radio noise floor.
Luckily, the communication implementation was much more straightforward than the SMT-SFT reverse engineering. I hooked up E22-900T30D LoRa modules to two separate Picos: one transmitter and one receiver. I wired the flight controller’s sensors to the transmitter Pico and started coding. TEKNOFEST requires telemetry data to be sent in strict 78-byte packets, but this time the specsheets were accurate, so I carried on without any issues.
I had the Picos transmitting data exactly how TEKNOFEST wanted in almost no time. I also added serial compatibility for the official Referee Ground Station program, which displays the live telemetry on a Windows interface.
The First Comms Test and the Birth of HypermachHYI
On May 7th, 2026, Hypermach went out for its first long-range communication test. The target distance was roughly 6km, spanning from Büyükada to coastal Pendik. Theoretically, LoRa can easily handle a 6km line-of-sight transmission provided it can draw enough current. Our setup was getting enough power, yet the connection abruptly cut out near the 1km mark. We tried everything we possibly could, including switching channels, but to no avail. The test was a semi-failure.
After evaluating our findings, we determined that the Yagi antenna we used on the receiver side wasn’t powerful enough for the distance, so we swapped it out for a higher-gain model. This fixed the problem; we successfully achieved a 1.5km link even through a crowded, high-interference urban area during a later test.
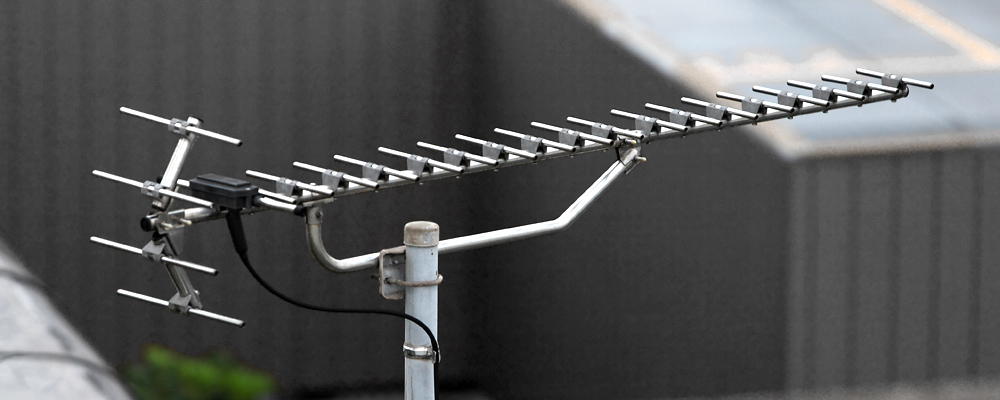
However, another glaring problem emerged during field testing: carrying a giant laptop around. It required 2 to 3 teammates crowded around a dim, 300-nit screen that lasted 90 minutes on battery power at best.
To solve this, I built a custom Android app called HypermachHYI.
The goal was to replace our bulky, power-hungry laptop setup with a lightweight, bright smartphone or tablet screen that fits right in your palm and runs for hours. The core idea was simple: pipe the telemetry data directly from our LoRa receiver into an Android device. The app reads the incoming data packets exactly as the ROKETSAN Referee Ground Station software would, meaning I didn’t have to modify my existing flight computer code.
To ensure maximum reliability without relying on unstable wireless connections in crowded testing zones, I implemented a direct wired link using a USB-OTG (On-The-Go) cable. By connecting the receiver Pico directly to the phone via a USB-to-TTL converter, the app taps into a raw serial data stream the moment it is plugged in.
Behind the scenes, the app relies on a dedicated background service to manage the serial connection. Since the E22 LoRa module outputs data continuously, a custom UsbSerialManager handles the low-level byte streams, filtering out data corruption and ensuring seamless hot-plugging if a cable accidentally gets tugged during a test.
That is everything that has happened so far with Hypermach. Stay tuned for Part 2!
Thank you for reading!
Hi Kerem,
I just finished reading your blog post. As someone who has known you for years and followed your journey from afar since you were very young, I have to say that I expect nothing less from you. Seeing you tackle challenges like these feels like a natural continuation of the curiosity and determination you’ve always had.
I wanted to say that what impressed me most was not the rocket itself, but your engineering mindset. Many students can connect sensors to a microcontroller and make them work. Far fewer can identify mistakes in official documentation, build debugging tools, sniff serial communications, reverse-engineer protocols and then successfully port the entire system to a different platform. Those are the kinds of skills that separate builders from people who simply follow tutorials.
I also liked that you documented not only your successes but your failures and unexpected problems. The LoRa range issue, the protocol inconsistencies, and the field-testing challenges are exactly the kinds of real-world obstacles engineers deal with every day.
My only constructive suggestion would be to keep investing time in documentation, testing methodology, and code maintainability. As projects become larger and involve more people, these skills become just as important as writing clean code.
For someone your age, this is genuinely impressive work. More importantly, it shows curiosity, persistence, and a willingness to investigate problems instead of working around them.
Keep building. I am looking forward to reading Part 2.
Thank you. Your evaluations and insights help me expand my capabilities and push my skills further than ever before. Receiving feedback from a developer of your caliber is incredibly motivating. Consider your comment framed and hung on the walls of my brain.
As I’ve already experienced firsthand how much of a headache flawed documentation can cause, I will definitely take your advice to heart and focus on improving my own documentation and code standardization.
Thank you once again for taking the time to read and comment.
Dear Kerem,
I really enjoyed reading your work. What impressed me most was how you were able to spot problems and come up with creative solutions instead of just stickin to the options that were put in front of you.
One thing I especially liked was your decision to develop software for a mobile device rather than a laptop. It may sound like a small detail compared to everything else you’ve done, but it shows a practical way of thinking that makes the system much easier and more convenient to use in the field for longer periods.
If I had to give an advice to anyone working on projects like this, it would be “to develop a mindset that fits the natural flow of the work and focuses on making things simpler and more practical.” But it seems that you already have that mindset. Keep using it, and don’t lose it.
I’m really looking forward to Part 2. And don’t forget, the job is not finished, keep pushing ✊
Thank you! Your feedback means a lot to me, and it’s incredibly rewarding to hear that the practical side of my work resonated with you.
I really appreciate you pointing out my decision to build for a mobile device. For my work, prioritizing user experience and quality-of-life features is essential, so knowing that choice hit the mark is fantastic validation.
Your advice on keeping things simple and intuitive is an excellent reminder, and I’ll absolutely make sure to protect that mindset as my projects grow more complex.
Thanks again for taking the time to share your insights. You can bet I’m already working on Part 2!
I really enjoyed reading your post. The way you approached the challenges you faced, creating a solution rather than just searching for one, and learning and developing with different technologies along the way—these are all extremely valuable achievements.
With every step of the project and every small victory, I felt that same sense of accomplishment that I’m sure you felt while working on it 🙂
After all, that’s the exact feeling that keeps us chasing these kinds of pursuits. It’s truly fantastic that you’ve experienced this feeling at such a young age.
Being a bit easily distracted or wanting to try everything at a young age is completely normal, and it can actually teach you precious skills—as long as you FINISH WHAT YOU START. What defines us isn’t what we start or think about doing, but what we actually finish.
I hope you maintain this determination to finish every project you begin!
Thank you so much for taking the time to read my post and for sharing such thoughtful feedback.
I really appreciate your perspective, especially regarding the importance of seeing projects through to completion. It is easy to get caught up in the excitement of new ideas, a constant challenge for me, as I’m always eager to tackle multiple problems at once, but bringing a project across the finish line is where the most valuable learning happens. Knowing that my experience resonated with you makes the effort even more rewarding.
I will certainly carry your advice forward into my next pursuits. Thank you again for the encouragement and support.
Wow.
I read this post of yours first and get back to bottom of the site to read all from the beginning. Keremcim, this is absolutely brilliant work. Jumping into the water in the first day, start swimming fearlessly and become a great developer fighting your way out. This is priceless. Never, never lose this passion.
You definitely are going in the right direction. Embedded SW development is a wonderful hobby, and it surely can turn into a lucrative business, as it is niche and not really easy :). But I noticed you didn’t mention anything about “using AI” in your post — maybe you did, and I missed, if so, sorry about that. In any case, I want to emphasize this a bit.
Today it is a different SW development world than 2-3 years ago. In every corner of every news site, YouTube channel or blog post, you may see the warning about the ominous AI which will replace all of us, developers. Well unfortunately, it is not completely false. But good news is, it is not completely true either. One obvious fact: There is no way fighting AI. Even though we may not like it, we have to be a team with it. Learning how to use AI properly is key today. But don’t get me wrong, and this is of utmost importance, you cannot and should not write a prompt, let AI do everything, get the project/product and use it. You have to have the full background, full theory, and full ability to implement the same project/product by yourself as if there were no AI today. Then and only then you should use AI for development. You need to make it explain each step it takes, and you should also make sure you understand it fully at each step. In short, you should only use AI only to expedite things. For example, if you can write an app in 10 days, and AI can do it in a couple of hours, then why not, if you know the code from top to bottom at then end?
Using AI is dangerous in our business. With a simple analogy, it is like using an oven in the kitchen. You can use it to prepare delicious meals, but if you don’t control the fire good enough, it can even burn the house down. You have to start getting deep in AI usage in coding or better in SW development process as a whole, now. But you should be careful, because you definitely have a spark in coding which will surely turn into a flame. Don’t you ever let AI to put it out. Because, it can, if you let it do everything and trust it blindly – you should be there and awake at all times.
Now, some reading recommendations for you:
Please start reading about the Agile methodology and Atlassian toolset usage (Jira, Confluence etc) if you haven’t done yet — these are essential for a corp future. By looking at your repos in Github, I assume you know Git already, but Git may be deeper than you know. You may want to take a deeper look to it to familiarize youself with all its functionality. Also, for your free time, I strongly suggest you start looking/using Gary Tan’s gstack (https://github.com/garrytan/gstack) for your daily development — requires Claude. This can seem overwhelming at the start, but it is definitely worth a look in your free time. This will probably very much the future SW developer specimen will be — Garry Tan (equipped with his tools) is an example for this new kind of SW developer, pushing out tons of projects in a month’s time.
Would love to discuss with you further. Keep up the good work, Keremcim.
Thank you for taking the time to read through everything and write such a detailed comment. I really appreciate both the encouragement and the advice.
Your point about AI especially resonates with me. I do use AI quite extensively in development, but I try to use it as a tool rather than as a replacement for understanding what I’m building. I’ve found it especially useful for accelerating implementation, testing ideas, reviewing code, and exploring unfamiliar parts of a system. At the same time, I try not to accept generated code just because it compiles or passes tests. I want to understand why it works, what assumptions it makes, and where it can fail. I think maintaining that balance is going to become increasingly important.
I also agree that there is a danger of becoming dependent on it. Being able to build something completely on my own, even if it is not that big of a project, is still something I would rather preserve, even if using AI makes the actual development process dramatically faster.
I’m quite comfortable with Git for my projects, but you’re probably right that there is quite a bit more depth there for me to explore. Agile and the Atlassian ecosystem are areas I haven’t studied yet, so I’ll definitely add those to my list.
And thank you for the gstack recommendation. I hadn’t looked into it before. I’ll experiment with it and Garry Tan’s workflow. The idea of using AI as part of the complete development process is particularly interesting to me.
Thanks again for all the advice and for taking the time to go through my work. I’d definitely be happy to discuss these things further!